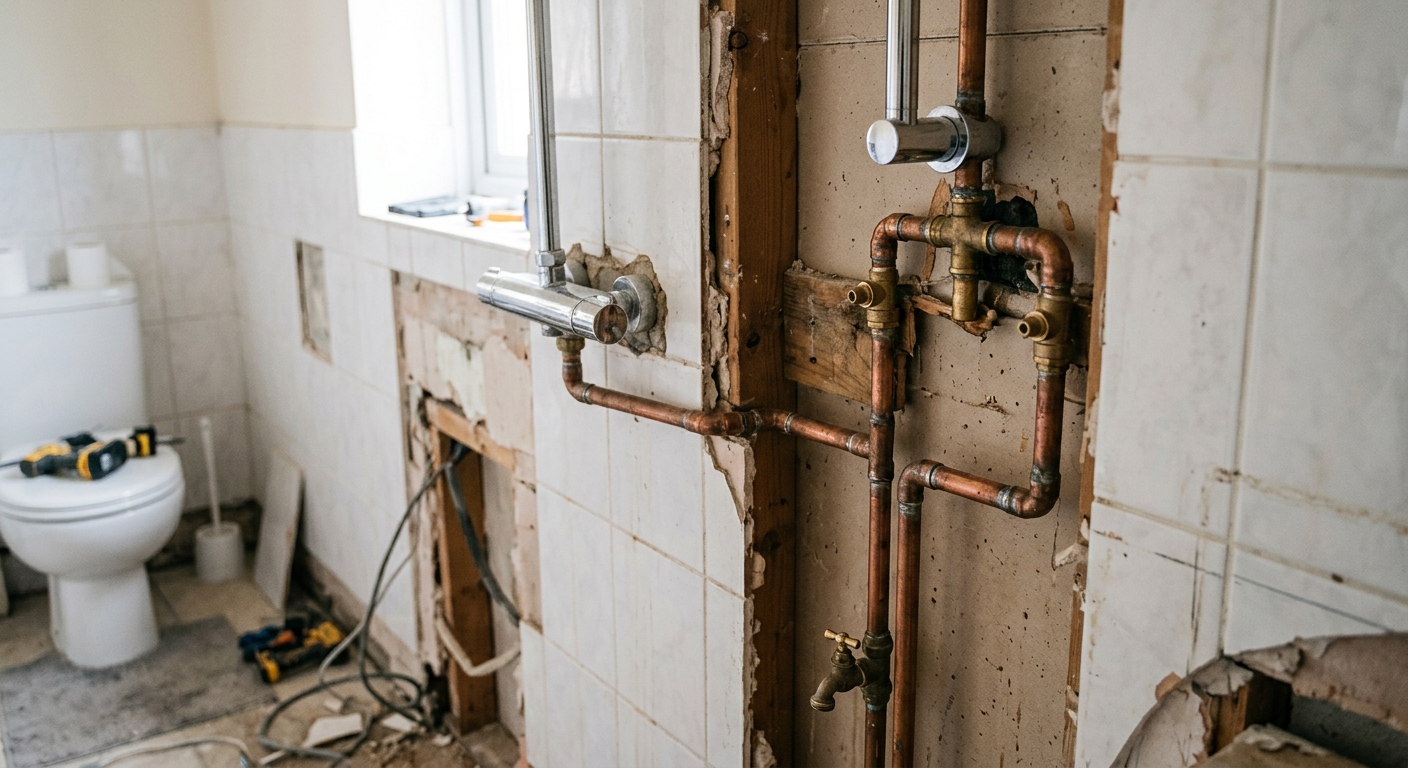
If your shower system has no local shutoff, your only option is the main water shutoff for the house or the branch line feeding the bathroom, and that’s the problem. A complete shower system with a thermostatic or pressure-balance valve, two to six body jets, and a handheld diverter has multiple supply and distribution points. Cutting water at the main to fix a dripping body jet means the whole house goes dry, and it means guessing whether you’ve actually isolated the right line when you turn it back on. The fix is isolation valves installed at the time of rough-in, not located after something fails.
Why Multi-Outlet Systems Need Isolation Valves
A single showerhead installation has one hot line, one cold line, and one valve body. A full system changes that math. A thermostatic mixing valve typically has hot and cold inlets plus one or more outlets feeding a diverter, which then splits to the fixed head, handheld, and body jet manifold. Each of those branches is a place where a cartridge can fail, a fitting can weep, or a body jet can need replacement. Without dedicated stops, servicing any single component means shutting down water to the entire bathroom, and often the adjacent rooms sharing that branch line.
This is not a hypothetical maintenance concern. Body jet manifolds in particular see more wear than a showerhead because they’re running multiple nozzles off shared supply, often at higher combined flow, and the small-diameter tubing to each jet is more prone to mineral buildup and fitting fatigue over time. When one jet needs service, you want to isolate that manifold only, not the thermostatic valve feeding the whole system.
Locating the Main Shutoff Safely
Before doing anything else, confirm where your main shutoff actually is and that it operates freely. In most homes this is where the supply line enters the foundation, in a basement, crawlspace, or utility closet, or at the meter itself if there’s a curb stop. Turn it a quarter turn or a few full turns (depending on valve type) once a year so it doesn’t seize. A main valve that hasn’t been touched in a decade is a real risk during an actual emergency, when you need it to close immediately and completely.
If your only option in a shower emergency is the main, you’re also shutting off every other fixture in the house. That’s acceptable for a genuine emergency (a supply line has split, water is spraying) but it’s not a workable solution for routine maintenance, which is exactly why isolation valves at the fixture matter.
What Code Requires for Accessible Shutoffs
Both the International Plumbing Code and the Uniform Plumbing Code require accessible shutoff valves for individual fixtures, typically specified as being installed on the supply line ahead of the fixture and located so they can be reached for operation and repair without removing permanent construction. The exact section numbers vary by code edition and local amendments, so check with your jurisdiction’s adopted code and any local amendments before final rough-in, but the principle is consistent across both models: every fixture supply should have its own accessible stop.
For a shower system, “the fixture” isn’t just the showerhead. Code officials generally expect stops on the hot and cold supply to the valve body itself, accessible through an access panel if the valve is behind a wall. Whether body jets need their own separate stops beyond the main valve isolation is often a matter of local interpretation and inspector discretion, which is why it’s worth building in more isolation than the bare code minimum, especially given how much harder body jet plumbing is to access once tile is set.
Adding Stops When You Install Valve and Jets
This is the point where isolation should be designed in, not retrofitted. If you’re specifying a complete system with a plumber, get isolation valves on the plans before rough-in inspection, not as a change order after tile is up.
- Main supply stops: 1/2 inch NPT quarter-turn ball valves on the hot and cold lines feeding the thermostatic or pressure-balance valve body, installed in an accessible location, typically behind a removable access panel on the opposite side of the wall from the shower.
- Body jet manifold isolation: a separate stop (or set of stops, if jets are on individual lines rather than a shared manifold) between the diverter output and the body jet distribution, so a jet or manifold fitting can be serviced without draining the main valve supply.
- Handheld diverter branch: usually covered by the main valve stops since the diverter is typically integral to or just downstream of the primary valve, but confirm this with your plumber based on the specific valve trim you’re installing.
- Access panel placement: plan the panel location during framing, sized to reach the valve bonnet and any stops, and finished in a way that doesn’t require destructive removal (a magnetic or hinged access panel matched to the wall finish, not a tiled-over cutout).
Quarter-turn ball valves are worth specifying over multi-turn gate or globe stops. A ball valve gives a visual and tactile confirmation of open versus closed with a 90-degree turn, seats more reliably after years of infrequent use, and is less prone to the packing leaks that older multi-turn stops develop. The cost difference between a quarter-turn ball valve and a multi-turn stop is minor relative to the rest of a system installation, and the reliability difference shows up exactly when you need it, which is usually years after installation when nobody remembers which way to turn a gate valve.
| Isolation Point | Typical Location | Valve Type Recommended |
|---|---|---|
| Main house shutoff | Foundation entry, basement, or meter | Quarter-turn ball valve where code and local water authority allow |
| Valve body supply (hot/cold) | Behind access panel opposite shower valve | 1/2 inch NPT quarter-turn ball valve |
| Body jet manifold | Behind access panel near manifold location | Quarter-turn ball valve, one per manifold or per jet zone |
| Handheld diverter branch | Usually integral to main valve trim | Confirm with valve manufacturer’s spec sheet |
Emergency Shutoff With No Local Valve
If you’re dealing with an active leak right now and there’s no isolation valve installed, go straight to the main shutoff for the house. Turn it fully closed, then open the shower’s fixtures (head, handheld, and body jets if accessible) to relieve pressure in the lines and confirm the water has actually stopped. Don’t assume the main is closed just because you turned the handle; check for pressure at an open fixture.
Once the immediate leak is controlled, that’s the point to call a plumber, not to attempt a repair on a system with no service stops. Trying to open the wall and replace a cartridge or fitting while running on the main shutoff means the rest of the house has no water, which is impractical for anything beyond a same-day fix. This is also the moment to have isolation valves added as part of the repair, so the same situation doesn’t force a whole-house shutdown next time.
Labeling and Testing Valves After Install
Once stops are in, they only help if you and anyone else working on the house can find and identify them. Label each valve at the access panel: which line it controls (hot supply, cold supply, body jet manifold), and confirm open and closed positions are obvious from the handle orientation on a quarter-turn ball valve.
Test every new stop before the access panel is closed up for good. Close each valve individually and confirm the corresponding fixture loses flow while the others keep working. This catches installation errors, like a stop plumbed to the wrong branch, while it’s still easy to fix. Do this test again a year after installation to confirm the valves haven’t seized, and once a year after that as routine maintenance.
If you’re specifying a new shower system now, put isolation valves on the plumber’s scope of work in writing before rough-in, not as an afterthought. Ask specifically for 1/2 inch NPT quarter-turn ball valves on the main valve supply and a separate stop for the body jet manifold, with an accessible panel sized for future service. If you already have a system with no local shutoff and you’re not mid-emergency, this is worth doing as a planned retrofit rather than waiting for a failure that forces a rushed, main-shutoff-only response.